
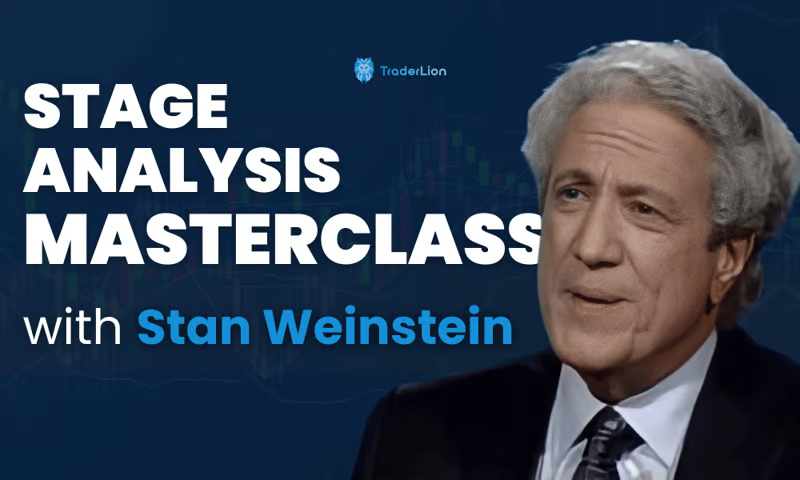
What is a TraderLion Stage Analysis Masterclass by Stan Weinstein for Cheap?
TraderLion Stage Analysis Masterclass by Stan Weinstein Index:
📄 SalesPage.txt (53.00 B)
📄 traderlion-stan-weinstein-stage-analysis-2022-07-28-15_45_45.png (16.50 MB)
📁 Module 0 – Setting the Stage
📄 IMPORTANT, READ FIRST!!!.png (460.23 KB)
📄 Module 0 content.png (59.62 KB)
📁 01 Meet Stan Weinstein
📄 Meet Stan Weinstein.png (1.27 MB)
📄 Welcome to the official Stage Analysis Masterclass with Stan Weinstein.mp4 (75.92 MB)
📁 02 The Origins of Stage Analysis
📄 The Origins of Stage Analysis.mp4 (55.02 MB)
📄 The Origins of Stage Analysis.png (1.48 MB)
📁 03 Get the Most of Stan’s Masterclass
📄 Get the Most of Stan’s Masterclass.png (1.88 MB)
📄 Make the Most of Stan_s Masterclass.mp4 (68.52 MB)
📁 Forum
📄 2b16089d941dfe7cb6ca0b612ad5fa3b.png (319.65 KB)
📄 35f53fbbc1f5469e0bd7ba268d63887f.jpg (86.33 KB)
📄 4f4ae6d518639e82efd8f3c4c8f4cbe7.jpg (80.33 KB)
📄 586a3ae4369df1d188d0038bc08f1e20.jpg (89.03 KB)
📄 65053d8f9f7c23681c93234aac3f12af.png (594.48 KB)
📄 74fc8b821314ff7881ad0fd8046f67a0.jpg (91.81 KB)
📄 FSLY.jpg (191.31 KB)
📄 IMG_6027-scaled-002.jpeg (204.94 KB)
📄 IMG_6027-scaled-1.jpeg (274.17 KB)
📄 a414dda316bdf5996e931c2ab600d26e.jpg (109.06 KB)
📄 f7e2d5938b83292ce0642ad2d5b41cd9.png (336.38 KB)
📄 fsly.jpeg (434.94 KB)
📄 fsly.png (348.21 KB)
📄 stage-analysis-masterclass-activity-2022.png (1013.67 KB)
📄 stage-analysis-masterclass-activity.png (7.22 MB)
📄 stage-analysis-masterclass-forum-stan-weinstein-stage-analysis-masterclass.png (543.05 KB)
📄 stage-analysis-masterclass-forum-topic-chance-to-win-a-signed-copy.png (602.16 KB)
📄 stage-analysis-masterclass-forum-topic-course-ui-feedback.png (587.42 KB)
📄 stage-analysis-masterclass-forum-topic-masterclass-schedule.png (607.52 KB)
📄 stage-analysis-masterclass-forum-topic-stan-weinsteins-stage-analysis-masterclass.png (1.87 MB)
📄 stan-weinstein-stage-analysis-masterclass-forum-topic-module-1-challenge-1-analyze-a-trade.png (2.26 MB)
📁 04 BONUS Stan’s Recent Institutional Letter
📄 Q2_2022_GTAIssue.pdf (65.99 MB)
📁 Module 08 – Routines _ Mindset
📄 Module 8 Routines _ Mindset.png (442.07 KB)
📄 Readme.txt (355.00 B)
📁 01 – Module 8 Overview
📄 Module 8 Overview.mp4 (4.52 MB)
📄 Module 8 Overview.png (1.51 MB)
📁 02 – Module 8 Resources
📄 Module 8 Resources.png (464.42 KB)
📄 Module-8-Workbook.pdf (2.70 MB)
📁 03 – Stan’s Screening Process
📄 Stan’s Screening Process.png (2.12 MB)
📁 04 – Quiz Stan’s Screening Process
📄 01.png (566.75 KB)
📄 02.png (356.72 KB)
📄 03.png (431.48 KB)
📄 04.png (1.24 MB)
📁 05 – Stan’s Routines
📄 Stan’s Routines.mp4 (29.99 MB)
📄 Stan’s Routines.png (2.61 MB)
📁 06 – Quiz Stan’s Routines
📄 01.png (569.61 KB)
📄 02.png (310.97 KB)
📄 03.png (521.74 KB)
📄 04.png (1.28 MB)
📁 07 – Mindset and Trading Pscyhology
📄 Mindset and Trading Pscyhology.mp4 (30.88 MB)
📄 Mindset and Trading Pscyhology.png (2.11 MB)
📁 08 – Quiz Mindset and Trading Pscyhology
📄 01.png (391.71 KB)
📄 02.png (495.26 KB)
📄 03.png (323.37 KB)
📄 04.png (1.02 MB)
📁 09 – Challenge 8 Outline your Routines
📄 Challenge 8 Outline your Routines.mp4 (3.13 MB)
📄 Challenge 8 Outline your Routines.png (1.04 MB)
📄 Module-8-Challenge.pdf (1.90 MB)
📄 Share on the Forum.txt (141.00 B)
📁 10 – Module 8 QnA Submission
📄 Module 8 QnA Submission.png (562.14 KB)
📁 Module 09 – The Full System
📄 Module 9 – The Full System.txt (373.00 B)
📄 Module 9 The Full System.png (452.02 KB)
📁 01 – Module 9 Overview
📄 Module 9 Overview.mp4 (3.08 MB)
📄 Module 9 Overview.png (1.51 MB)
📁 02 – Module 9 Resources
📄 Module 9 Resources.png (467.39 KB)
📄 Module-9-Workbook.pdf (2.73 MB)
📁 03 – Putting the Pieces Together
📄 Putting the Pieces Together.png (5.63 MB)
📁 04 – Key Lessons to Remember
📄 Key Lessons to Remember.png (2.52 MB)
📁 05 – Adapting to Changing Markets
📄 Adapting to Changing Markets.mp4 (16.17 MB)
📄 Adapting to Changing Markets.png (5.39 MB)
📁 06 – Quiz Adapting to Changing Markets
📄 01.png (444.96 KB)
📄 02.png (529.63 KB)
📄 03.png (455.23 KB)
📄 04.png (492.39 KB)
📄 05.png (420.91 KB)
📄 06.png (2.04 MB)
📁 07 – The Ball Is In Your Court
📄 The Ball Is In Your Court.png (1.50 MB)
📁 08 – Module 9 Full Discussion Video
📄 Module 9 Full Discussion Video.mp4 (126.11 MB)
📄 Module 9 Full Discussion Video.png (585.46 KB)
📄 Module-9-Discussion-Slides-Stage-Analysis-Masterclass-I.pdf (87.00 MB)
📄 Module-9-Full-Discussion-Transcript-Selling-Short-Changing-Mark.txt (47.23 KB)
📁 09 – Challenge 9 Build Your Full Stage Analysis System
📄 Challenge 9 Build Your Full Stage Analysis System.mp4 (4.51 MB)
📄 Challenge 9 Build Your Full Stage Analysis System.png (2.35 MB)
📄 Module-9-Challenge.pdf (3.22 MB)
📄 Share on the Forum.txt (141.00 B)
📁 10 – Module 9 QnA Submission
📄 Module 9 QnA Submission.png (597.22 KB)
📁 Module 1 – Build Your Foundation
📄 Module 1 Content.png (132.05 KB)
📁 01 Stan’s Philosophy of Investing
📄 Stan’s Philosophy of Investing.png (3.08 MB)
📁 02 Quiz 1 – Stan’s Philosophy of Investing
📄 01.png (364.61 KB)
📄 02.png (288.95 KB)
📄 03.png (339.50 KB)
📄 04.png (289.62 KB)
📄 05.png (392.55 KB)
📄 06.png (1.03 MB)
📁 03 The Market Cycle
📄 Resistance-zone.webp (35.88 KB)
📄 The Market Cycle.png (1.40 MB)
📁 04 Quiz 2 – The Market Cycle
📄 01.png (270.46 KB)
📄 02.png (326.28 KB)
📄 03.png (272.15 KB)
📄 04.png (299.97 KB)
📄 05.png (823.04 KB)
📁 05 Speaking The Same Technical Language Part 1
📄 Investor.png (35.05 KB)
📄 Long-Term.png (33.43 KB)
📄 Resistance (Supply).png (43.79 KB)
📄 Short-Term.png (12.35 KB)
📄 Speaking The Same Technical Language Part 1.png (1.11 MB)
📄 Support.png (61.56 KB)
📄 Trader.png (32.20 KB)
📄 Trading Range.png (45.50 KB)
📁 06 Speaking The Same Technical Language Part 2
📄 Speaking The Same Technical Language, Part 2.png (2.94 MB)
📁 07 Quiz 3 – Speaking the Same Language
📄 01.png (305.45 KB)
📄 02.png (306.62 KB)
📄 03.png (289.00 KB)
📄 04.png (292.88 KB)
📄 05.png (339.40 KB)
📄 06.png (293.42 KB)
📄 07.png (302.91 KB)
📄 08.png (288.87 KB)
📄 09.png (953.71 KB)
📁 08 How to Read a Chart
📄 How to Read a Stock Chart.mp4 (25.55 MB)
📄 How to Read a Stock Chart.png (2.28 MB)
📁 09 Quiz 4 – How to Read a Chart
📄 01.png (284.64 KB)
📄 02.png (284.20 KB)
📄 03.png (326.48 KB)
📄 04.png (579.91 KB)
📁 10 Challenge 1 Analyze A Trade
📄 Challenge #1 Analyze DOCU.png (814.32 KB)
📄 IMG_6027-scaled.jpeg (161.74 KB)
📁 Forum
📄 2b16089d941dfe7cb6ca0b612ad5fa3b.png (319.65 KB)
📄 35f53fbbc1f5469e0bd7ba268d63887f.jpg (86.33 KB)
📄 4f4ae6d518639e82efd8f3c4c8f4cbe7.jpg (80.33 KB)
📄 586a3ae4369df1d188d0038bc08f1e20.jpg (89.03 KB)
📄 74fc8b821314ff7881ad0fd8046f67a0.jpg (91.81 KB)
📄 FSLY.jpg (191.31 KB)
📄 IMG_6027-scaled-002.jpeg (204.94 KB)
📄 IMG_6027-scaled-1.jpeg (274.17 KB)
📄 a414dda316bdf5996e931c2ab600d26e.jpg (109.06 KB)
📄 f7e2d5938b83292ce0642ad2d5b41cd9.png (336.38 KB)
📄 fsly.jpeg (434.94 KB)
📄 fsly.png (348.21 KB)
📄 stage-analysis-masterclass-forum-topic-module-1-challenge-1-analyze-a-trade.png (2.36 MB)
📁 Module 10 – 10 Million Dollars worth of Charts
📄 Module 10 – 10 Million Dollars worth of Charts.txt (227.00 B)
📄 Module 10 10 Million Dollars worth of Charts.png (380.77 KB)
📁 01 – Module 10 Overview
📄 Module 10 Overview.mp4 (3.65 MB)
📄 Module 10 Overview.png (1.03 MB)
📁 02 – Stage 1 In Focus
📄 Stage 1 In Focus.png (480.48 KB)
📄 Stage1-Examples-C1.pdf (140.84 MB)
📁 03 – Stage 2 In Focus
📄 Stage 2 In Focus.png (477.92 KB)
📄 Stage2-Examples-CX.pdf (149.02 MB)
📁 04 – Stage 3 In Focus
📄 Stage 3 In Focus.png (481.47 KB)
📄 Stage3-Examples-CZ.pdf (145.31 MB)
📁 05 – Stage 4 In Focus
📄 Stage 4 In Focus.png (481.57 KB)
📄 Stage4-Examples-CW.pdf (135.78 MB)
📁 06 – The Full Cycle
📄 Full-Cycle-Examples-FCE.pdf (153.23 MB)
📄 The Full Cycle.png (471.60 KB)
📁 07 – Challenge 10 3 Full Cycle Charts
📄 Challenge 10 3 Full Cycle Charts.mp4 (9.75 MB)
📄 Challenge 10 3 Full Cycle Charts.png (1.02 MB)
📄 Share on the Forum.txt (147.00 B)
📁 Module 11 – Full Discussions
📄 Module 11 – Full Discussions.txt (216.00 B)
📄 Module 11 Full Discussions.png (335.87 KB)
📁 Discussion 1 – Stage Analysis
📄 Discussion 1 Stage Analysis.mp4 (92.08 MB)
📄 Discussion 1 Stage Analysis.png (684.78 KB)
📄 Interview-1-Introduction-and-The-Four-Stages.txt (41.47 KB)
📄 Interview-1-Slides-Stage-Analysis-Masterclass.pdf (76.37 MB)
📁 Discussion 2 – Market Analysis
📄 Discussion 2 Market Analysis.mp4 (110.81 MB)
📄 Discussion 2 Market Analysis.png (565.90 KB)
📄 Module-7-Discussion-Slides-Stage-Analysis-Masterclass.pdf (97.65 MB)
📄 Module-7-Full-Discussion-Market-Analysis.txt (62.50 KB)
📁 Discussion 3 – Routines and Stock Selection
📄 Discussion 3 Routines and Stock Selection.mp4 (199.38 MB)
📄 Discussion 3 Routines and Stock Selection.png (703.24 KB)
📄 Module-4-Discussion-Video.txt (76.54 KB)
📄 Stage-Analysis-Masterclass-Module-4-DiscussionSlides.pdf (95.68 MB)
📁 Discussion 4 – Ideal Buy Points
📄 Discussion 4 Ideal Buy Points.mp4 (134.46 MB)
📄 Discussion 4 Ideal Buy Points.png (688.57 KB)
📄 Module-5-Full-Discussion.txt (51.13 KB)
📄 Stage-Analysis-Masterclass-Module-5-Discussion-Sl.pdf (66.94 MB)
📁 Discussion 5 – Sell Rules _ Selling Short
📄 Discussion 5 Sell Rules _ Selling Short.mp4 (126.45 MB)
📄 Discussion 5 Sell Rules _ Selling Short.png (605.72 KB)
📄 Module-9-Discussion-Slides-Stage-Analysis-Masterclass-I.pdf (87.00 MB)
📄 Module-9-Full-Discussion-Transcript-Selling-Short-Changing-Markets-Mindset-Conclusion.txt.txt (47.23 KB)
📁 Module 12 – Resources _ What’s Next
📄 Module 12 – Resources _ What’s Next.txt (77.00 B)
📄 Module 12 Resources _ What’s Next.png (273.83 KB)
📁 01 – Resources
📄 Resources.png (1.08 MB)
📁 02 – What’s Next
📄 What’s Next.png (940.44 KB)
📁 Module 2 – Stage Analysis
📄 Module 2 Stage Analysis.png (527.92 KB)
📄 Readme.txt (481.00 B)
📁 01 Module 2 – Overview
📄 Module 2 – Overview.mp4 (36.40 MB)
📄 Module 2 – Overview.png (2.01 MB)
📁 02 Module 2 – Resources
📄 Mod-2-Workbook.pdf (5.47 MB)
📄 Module 2 – Resources.png (432.79 KB)
📁 03 The Tape Tells All Stage Analysis Overview
📄 The Tape Tells All Stage Analysis Overview.mp4 (46.69 MB)
📄 The Tape Tells All Stage Analysis Overview.png (2.06 MB)
📁 04 Quiz Overview of Stage Analysis
📄 01.png (471.63 KB)
📄 02.png (361.08 KB)
📄 03.png (367.55 KB)
📄 04.png (393.43 KB)
📄 05.png (1.24 MB)
📁 05 Stage 1 The Basing Area
📄 Stage 1 The Basing Area.mp4 (12.50 MB)
📄 Stage 1 The Basing Area.png (4.25 MB)
📁 06 Quiz Stage 1 The Basing Area
📄 01.png (382.66 KB)
📄 02.png (352.09 KB)
📄 03.png (390.89 KB)
📄 04.png (396.54 KB)
📄 05.png (392.90 KB)
📄 06.png (1.39 MB)
📁 07 Stage 2 Advance
📄 Stage 2 Advance.png (6.07 MB)
📁 08 Quiz Stage 2 Advancing Phase
📄 01.png (432.72 KB)
📄 02.png (385.21 KB)
📄 03.png (369.89 KB)
📄 04.png (467.07 KB)
📄 05.png (399.48 KB)
📄 06.png (1.60 MB)
📁 09 Stage 3 Topping
📄 Stage 3 Topping.png (3.48 MB)
📁 10 Quiz Stage 3 Top Area
📄 01.png (428.09 KB)
📄 02.png (491.20 KB)
📄 03.png (351.03 KB)
📄 04.png (380.19 KB)
📄 05.png (1.44 MB)
📁 11 Stage 4 Decline
📄 Stage 4 Decline.png (3.77 MB)
📁 12 Quiz Stage 4 Decline
📄 01.png (384.43 KB)
📄 02.png (388.63 KB)
📄 03.png (492.63 KB)
📄 04.png (432.55 KB)
📄 05.png (1.38 MB)
📁 13 Challenge 2 Master the Stage Analysis Cycle
📄 Challenge 2 Master the Stage Analysis Cycle.mp4 (13.60 MB)
📄 Challenge 2 Master the Stage Analysis Cycle.png (1.04 MB)
📄 Mod 2 Challenges.pdf (177.34 MB)
📄 Submit in the Forum.txt (153.00 B)
📁 14 QnA Submission
📄 QnA Submission.png (462.79 KB)
📄 QnA Submission.txt (128.00 B)
📁 15 Discussion 1 Full Video
📄 Discussion 1 Full Video.mp4 (358.73 MB)
📄 Discussion 1 Full Video.png (602.66 KB)
📄 Transcript Interview-1-Introduction-and-The-Four-Stages.txt (41.47 KB)
📁 Module 3 – Stock Selection _ Ideal Buy Points
📄 Module 3 – Stock Selection _ Ideal Buy Points.png (557.24 KB)
📄 Readme.txt (573.00 B)
📁 01 Module 3 Overview
📄 Module 3 Overview.mp4 (20.02 MB)
📄 Module 3 Overview.png (1.05 MB)
📁 02 Module 3 Resources
📄 Mod-3-Workbook.pdf (9.65 MB)
📄 Module 3 Resources.png (483.42 KB)
📁 03 The Forest to the Trees Approach
📄 The Forest to the Trees Approach.mp4 (161.52 MB)
📄 The Forest to the Trees Approach.png (4.60 MB)
📄 Weekly Scan.txt (57.00 B)
📁 04 Quiz Forest to Trees Approach
📄 01.png (432.87 KB)
📄 02.png (403.95 KB)
📄 03.png (508.92 KB)
📄 04.png (431.57 KB)
📄 05.png (466.55 KB)
📄 06.png (1.74 MB)
📁 05 Ideal Buy Point for Investors
📄 Ideal Buy Point for Investors.mp4 (173.57 MB)
📄 Ideal Buy Point for Investors.png (4.52 MB)
📁 06 Quiz Ideal Buy Point for Investors
📄 01.png (434.88 KB)
📄 02.png (383.10 KB)
📄 03.png (416.63 KB)
📄 04.png (447.87 KB)
📄 05.png (1.35 MB)
📁 07 Ideal Buy Point for Traders
📄 Ideal Buy Point for Traders.mp4 (184.36 MB)
📄 Ideal Buy Point for Traders.png (2.75 MB)
📁 08 Quiz Ideal Buy Point for Traders
📄 01.png (456.22 KB)
📄 02.png (442.48 KB)
📄 03.png (928.78 KB)
📁 09 Risk Management Principles
📄 Risk Management Principles.png (2.26 MB)
📁 10 Quiz Risk Management Principles
📄 01.png (420.90 KB)
📄 02.png (475.79 KB)
📄 03.png (895.62 KB)
📁 11 Risk Management for Long Positions
📄 Risk Management for Long Positions.mp4 (44.13 MB)
📄 Risk Management for Long Positions.png (2.58 MB)
📁 12 Quiz Risk Management Principles for Long Positions
📄 01.png (400.20 KB)
📄 02.png (428.84 KB)
📄 03.png (537.00 KB)
📄 04.png (1.16 MB)
📁 13 What Not to Buy
📄 What Not to Buy.mp4 (26.85 MB)
📄 What Not to Buy.png (1.79 MB)
📁 14 Quiz What Not to Buy
📄 01.png (423.60 KB)
📄 02.png (670.59 KB)
📁 15 Challenge 3 Spotting Ideal Buy Points
📄 Challenge 3 Spotting Ideal Buy Points.mp4 (16.00 MB)
📄 Challenge 3 Spotting Ideal Buy Points.png (1.31 MB)
📄 Mod 3 Challenge.pdf (663.21 MB)
📄 Share on Forum.txt (116.00 B)
📁 Module 4 – Advanced Technical Analysis
📄 Module 4 Advanced Technical Analysis.png (1.44 MB)
📄 Readme.txt (366.00 B)
📁 01 Module 4 Overview
📄 Module 4 Advanced Technical Analysis.mp4 (19.57 MB)
📄 Module 4 Advanced Technical Analysis.png (1.44 MB)
📁 02 Module 4 Resources
📄 Module 4 Resources.png (476.06 KB)
📄 Module-4-Workbook.pdf (3.16 MB)
📁 03 Group _ Sector Strength
📄 Group _ Sector Strength 1.png (7.26 MB)
📄 Group _ Sector Strength 2.png (6.90 MB)
📄 Group _ Sector Strength 3.png (1.30 MB)
📁 04 Quiz Group and Sector Strength
📄 01.png (575.11 KB)
📄 02.png (487.00 KB)
📄 03.png (403.64 KB)
📄 04.png (473.88 KB)
📄 05.png (1.48 MB)
📁 05 Overhead Resistance
📄 Overhead Resistance.mp4 (37.24 MB)
📄 Overhead Resistance.png (5.06 MB)
📁 06 Quiz Overhead Resistance
📄 01.png (410.30 KB)
📄 02.png (391.05 KB)
📄 03.png (452.50 KB)
📄 04.png (506.13 KB)
📄 05.png (531.04 KB)
📄 06.png (447.07 KB)
📄 07.png (427.09 KB)
📄 08.png (2.19 MB)
📁 07 Relative Strength
📄 Relative Strength.mp4 (12.36 MB)
📄 Relative Strength.png (2.92 MB)
📁 08 Quiz Relative Strength
📄 01.png (379.78 KB)
📄 02.png (403.33 KB)
📄 03.png (563.78 KB)
📄 04.png (451.42 KB)
📄 05.png (446.05 KB)
📄 06.png (430.32 KB)
📄 07.png (1.75 MB)
📁 09 Volume Big _ Repeated
📄 Volume Big _ Repeated.png (3.68 MB)
📁 10 Quiz Volume, Big _ Repeated
📄 01.png (408.83 KB)
📄 02.png (492.12 KB)
📄 03.png (520.78 KB)
📄 04.png (464.43 KB)
📄 05.png (534.06 KB)
📄 06.png (505.58 KB)
📄 07.png (2.11 MB)
📁 11 Module 4 Full Discussion
📄 Module 4 Full Discussion.mp4 (661.67 MB)
📄 Module 4 Full Discussion.png (659.49 KB)
📄 Module-4-Discussion-Video.txt (76.54 KB)
📄 Stage-Analysis-Masterclass-Module-4-DiscussionSlides.pdf (95.68 MB)
📁 12 Challenge 4 Applying our Knowledge
📄 Challenge 4 Applying our Knowledge.mp4 (16.00 MB)
📄 Challenge 4 Applying our Knowledge.png (1.32 MB)
📄 Module-4-Challenge.pdf (6.06 MB)
📄 Module-4-Challenge_complete.pdf (7.41 MB)
📄 Share on the Forum.txt (147.00 B)
📄 Stan Weinstein Stage Analysis Masterclass.png (1.01 MB)
📁 13 Module 4 QnA Submission
📄 Module 4 QnA Submission.png (520.16 KB)
📁 Photos
📄 1.png (77.39 KB)
📄 2.png (916.11 KB)
📄 3.png (93.95 KB)
📄 4.png (117.46 KB)
📄 5.png (78.47 KB)
📄 6.png (154.33 KB)
📄 7.png (4.67 MB)
📁 Module 5 – Sell Rules _ Position Management
📄 Module 5 Sell Rules _ Position Management.png (570.83 KB)
📄 Readme.txt (582.00 B)
📁 01 – Module 5 Overview
📄 Module 5 Overview.mp4 (4.83 MB)
📄 Module 5 Overview.png (1.92 MB)
📁 02 – Module 5 Resources
📄 Module 5 Resources.png (474.87 KB)
📄 Module-5-Workbook.pdf (4.05 MB)
📁 03 – Keys for Position Management
📄 Keys for Position Management.mp4 (32.24 MB)
📄 Keys for Position Management.png (2.41 MB)
📁 04 – Quiz Keys for Position Management
📄 01.png (438.52 KB)
📄 02.png (426.71 KB)
📄 03.png (491.75 KB)
📄 04.png (527.72 KB)
📄 05.png (1.62 MB)
📁 05 – Stop Losses _ Stop Loss Management
📄 Stop Losses _ Stop Loss Management.mp4 (6.24 MB)
📄 Stop Losses _ Stop Loss Management.png (2.53 MB)
📁 06 – Quiz Stop Losses and Stop Loss Management
📄 01.png (599.88 KB)
📄 02.png (422.93 KB)
📄 03.png (592.17 KB)
📄 04.png (420.19 KB)
📄 05.png (1.60 MB)
📁 07 – Selling into Strength
📄 AAPL-5.3-scaled.jpg (199.99 KB)
📄 PLAB-5.3-scaled.jpg (170.52 KB)
📄 PRVA-5.3-scaled.jpg (142.19 KB)
📄 SMCI-5.3-scaled.jpg (186.05 KB)
📄 Selling into Strength.mp4 (5.33 MB)
📄 Selling into Strength.png (2.55 MB)
📁 08 – Quiz Selling into Strength
📄 01.png (412.50 KB)
📄 02.png (498.26 KB)
📄 03.png (417.53 KB)
📄 04.png (1.29 MB)
📁 09 – Adding to Positions
📄 Adding to Positions.mp4 (13.17 MB)
📄 Adding to Positions.png (4.35 MB)
📁 10 – Quiz Adding to Positions
📄 01.png (433.41 KB)
📄 02.png (448.20 KB)
📄 03.png (457.89 KB)
📄 04.png (1.22 MB)
📁 11 – Selling Into Weakness
📄 Selling Into Weakness.mp4 (13.85 MB)
📄 Selling Into Weakness.png (4.27 MB)
📁 12 – Quiz Selling into Weakness
📄 01.png (318.70 KB)
📄 02.png (443.51 KB)
📄 03.png (461.53 KB)
📄 04.png (527.99 KB)
📄 05.png (1.53 MB)
📁 13 – Portfolio Management
📄 Portfolio Management.mp4 (24.29 MB)
📄 Portfolio Management.png (2.08 MB)
📁 14 – Quiz Portfolio Management
📄 01.png (396.13 KB)
📄 02.png (442.28 KB)
📄 03.png (419.04 KB)
📄 04.png (1.26 MB)
📁 15 – The Anatomy of a Trade
📄 The Anatomy of a Trade.png (6.78 MB)
📁 16 – Module 5 Full Discussion
📄 Module 5 Full Discussion.mp4 (134.87 MB)
📄 Module 5 Full Discussion.png (649.05 KB)
📄 Module 5 Full Discussion.txt (51.13 KB)
📄 Readme.txt (51.13 KB)
📄 Stage-Analysis-Masterclass-Module-5-Discussion-Slide.pdf (66.94 MB)
📁 17 – Challenge 5 Updating Your Rule Set
📄 Challenge 5 Updating Your Rule Set.mp4 (2.16 MB)
📄 Challenge 5 Updating Your Rule Set.png (960.45 KB)
📄 Module 5 Challenge 5 – Updating Your Rule Set.png (606.61 KB)
📄 Module-5-Challenge.pdf (2.48 MB)
📄 Share on the Forum.txt (142.00 B)
📁 18 – Module 5 QnA Submission
📄 Module 5 QnA Submission.png (527.14 KB)
📁 Module 6 – Short Selling _ Risk Management
📄 Module 6 Short Selling _ Risk Management.png (537.16 KB)
📄 Readme.txt (559.00 B)
📁 01 – Module 6 Overview
📄 Module 6 Overview.mp4 (2.98 MB)
📄 Module 6 Overview.png (1.48 MB)
📁 02 – Module 6 Resources
📄 Module 6 Resources.png (484.92 KB)
📄 Module-6-Workbook.pdf (9.68 MB)
📁 03 – Short Selling – The Road Less Traveled
📄 AMZN6.1-4LowVolumeBreakDownExample-scaled.jpg (204.75 KB)
📄 ETSY-6.1-scaled.jpg (207.80 KB)
📄 FVRRExample-scaled.jpg (185.54 KB)
📄 IGV-6.1-scaled.jpg (204.67 KB)
📄 IWM6.1-1-scaled.jpg (197.77 KB)
📄 NET6.1-1-scaled.jpg (180.35 KB)
📄 PTON-6.1-scaled.jpg (186.33 KB)
📄 ROKUExample-scaled.jpg (188.73 KB)
📄 SNAP-6.1-2-scaled.jpg (174.50 KB)
📄 Short Selling – The Road Less Traveled.png (3.91 MB)
📄 ZBRADaily6.1SectorExample-scaled.jpg (220.12 KB)
📄 ZS6.1-1-scaled.jpg (180.72 KB)
📁 04 – Quiz Short Selling – The Road Less Traveled
📄 01.png (502.03 KB)
📄 02.png (435.38 KB)
📄 03.png (444.83 KB)
📄 04.png (1.20 MB)
📁 05 – Common Mistakes when Selling Short
📄 Common Mistakes when Selling Short.mp4 (9.03 MB)
📄 Common Mistakes when Selling Short.png (3.07 MB)
📁 06 – Quiz Common Mistakes when Shorting
📄 01.png (469.38 KB)
📄 02.png (436.20 KB)
📄 03.png (465.51 KB)
📄 04.png (327.12 KB)
📄 05.png (1.54 MB)
📁 07 – The Ideal Short Setups
📄 The Ideal Short Setups.mp4 (9.86 MB)
📄 The Ideal Short Setups.png (5.02 MB)
📁 08 – Quiz Ideal Short Setups
📄 01.png (441.18 KB)
📄 02.png (708.05 KB)
📄 03.png (736.84 KB)
📄 04.png (698.74 KB)
📄 05.png (700.11 KB)
📄 06.png (2.38 MB)
📁 09 – Risk and Position Management when Selling Short
📄 COUP-6.4-scaled.jpg (187.42 KB)
📄 FSLY-6.4-1-scaled.jpg (212.08 KB)
📄 FSLY-6.4-scaled.jpg (208.51 KB)
📄 NET-6.4-1-scaled.jpg (211.70 KB)
📄 NET-6.4-scaled.jpg (208.11 KB)
📄 Risk and Position Management when Selling Short.mp4 (16.99 MB)
📄 Risk and Position Management when Selling Short.png (5.80 MB)
📄 TWLO-6.4-scaled.jpg (197.30 KB)
📄 ZBRA-6.4-scaled.jpg (245.09 KB)
📁 10 – Quiz Risk and Position Management when Selling Short
📄 01.png (526.85 KB)
📄 02.png (527.10 KB)
📄 03.png (421.17 KB)
📄 04.png (1.26 MB)
📁 11 – The Anatomy of a Short Sell
📄 The Anatomy of a Short Sell.png (5.66 MB)
📁 12 – Challenge 6 Annotate Stan’s Short Setups
📄 Challenge 6 Annotate Stan’s Short Setups.mp4 (1.74 MB)
📄 Challenge 6 Annotate Stan’s Short Setups.png (983.49 KB)
📄 Share on the Forum.txt (149.00 B)
📁 Forum
📄 01.png (1.59 MB)
📄 AAN.jpg (135.07 KB)
📄 SI-6.3-1-scaled-1.jpg (231.50 KB)
📁 13 – Module 6 QnA Submission
📄 Module 6 QnA Submission.png (596.19 KB)
📁 Module 7 – Market _ Sector Analysis
📄 Module 7 Market _ Sector Analysis.png (1.19 MB)
📄 Readme.txt (573.00 B)
📁 01 – Module 7 Overview
📄 Module 7 Overview.png (3.25 MB)
📁 02 – Module 7 Resources
📄 Module 7 Overview.mp4 (6.47 MB)
📄 Module 7 Resources.png (909.78 KB)
📄 Module-7-Workbook.pdf (3.58 MB)
📁 03 – Stage Analysis for the Market Averages
📄 Stage Analysis for the Market Averages .mp4 (56.51 MB)
📄 Stage Analysis for the Market Averages .png (9.34 MB)
📁 04 – Quiz Market Analysis using Stage Analysis
📄 01.png (1.02 MB)
📄 02.png (898.82 KB)
📄 03.png (1.13 MB)
📄 04.png (2.59 MB)
📁 05 – The Advance Decline Line
📄 1987DowNegativeDivergence-scaled.jpg (744.58 KB)
📄 7.2ADMarketinSyncDownside2008-scaled.jpg (210.74 KB)
📄 7.2DowADUpIndexUp-scaled.jpg (167.99 KB)
📄 7.2MultimonthDivergence-scaled.jpg (229.25 KB)
📄 7.2NegativeDivergenceAD-scaled.jpg (229.57 KB)
📄 Dow1962NegativeDivergence-scaled.jpg (904.88 KB)
📄 Dow1962PositiveDivergence-scaled.jpg (900.78 KB)
📄 Dow1970PositiveDivergence-scaled.jpg (887.81 KB)
📄 Dow1972-73NegativeDivergence-scaled.jpg (997.21 KB)
📄 Dow1973NegativeDivergence-scaled.jpg (905.56 KB)
📄 The Advance Decline Line.mp4 (9.75 MB)
📄 The Advance Decline Line.png (8.35 MB)
📁 06 – Quiz The Advance Decline Line
📄 01.png (889.03 KB)
📄 02.png (843.82 KB)
📄 03.png (1.15 MB)
📄 04.png (732.07 KB)
📄 05.png (2.71 MB)
📁 07 – The Momentum Index
📄 The Momentum Index.mp4 (12.75 MB)
📄 The Momentum Index.png (5.75 MB)
📁 08 – Quiz The Momentum Index
📄 01.png (888.58 KB)
📄 02.png (977.12 KB)
📄 03.png (1.07 MB)
📄 04.png (2.44 MB)
📁 09 – Secondary Indicators
📄 Secondary Indicators.mp4 (123.42 MB)
📄 Secondary Indicators.png (9.46 MB)
📁 10 – Quiz Secondary Indicators
📄 01.png (910.31 KB)
📄 02.png (895.21 KB)
📄 03.png (828.07 KB)
📄 04.png (696.50 KB)
📄 05.png (2.26 MB)
📁 11 – Application of Market Analysis
📄 Application of Market Analysis.mp4 (72.74 MB)
📄 Application of Market Analysis.png (5.40 MB)
📁 12 – Quiz Application of Market Analysis
📄 01.png (1.04 MB)
📄 02.png (1.37 MB)
📄 03.png (980.34 KB)
📄 04.png (1.05 MB)
📄 05.png (1.22 MB)
📄 06.png (4.55 MB)
📁 13 – Recent Market Analysis Case Study
📄 Recent Market Analysis Case Study.png (13.12 MB)
📁 14 – Module 7 Full Discussion Video
📄 Module 7 Full Discussion Video.mp4 (243.46 MB)
📄 Module 7 Full Discussion Video.png (1.38 MB)
📄 Module-7-Discussion-Slides-Stage-Analysis-Masterclass.pdf (97.65 MB)
📄 Module-7-Full-Discussion-Market-Analysis.txt (62.50 KB)
📁 15 – Module 7 Challenge
📄 Module 7 Challenge.mp4 (3.58 MB)
📄 Module 7 Challenge.png (2.14 MB)
📄 Module-7-Challenge.pdf (10.75 MB)
📄 Share on the Forum.txt (144.00 B)
📁 16 – Module 7 QnA Submission
📄 Module 7 QnA Submission.png (1.10 MB)
💬 Feel free to REACH OUT to our CHAT support for personalized assistance and detailed information tailored to your needs. We’re here to help!


Reviews
There are no reviews yet.